Difference between revisions of "How to Rip VHS"
(Created page with "This is a guide about the logistics of ripping a VHS tape. Why would anyone want to do this? Surprisingly, there are a lot of films that never made it on to DVD, and are stuck...") |
(No difference)
|
Latest revision as of 20:09, 14 December 2012
This is a guide about the logistics of ripping a VHS tape. Why would anyone want to do this? Surprisingly, there are a lot of films that never made it on to DVD, and are stuck back in the age of magnetic tape. On top of this, other films have editions, workprints, or alternate scenes only available on an older tape release. The only way to watch them is to hunt down a used tape and hope for the best. With this guide, hopefully people can become more aware of how to rip from a tape, and save some lost classics!
Contents
Choose your VCR
Basic VCR
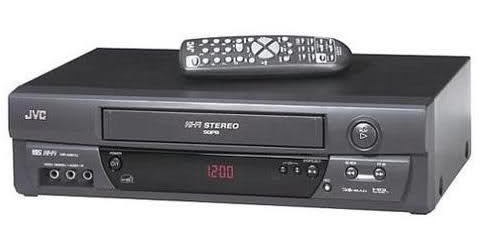
It all starts with the right VCR. How do you know what to choose? At a minimum, it is good to start with a Hi-Fi player with stereo out. Many VCRs you will find have Hi-Fi capability, which was introduced in 1985 as an upgrade to the linear track (both mono and stereo formats exist) system first implemented in VCRs. VCR Hi-Fi caught on in the 1990's and offered near-CD quality audio. It may be a bit harder to find a VCR with stereo out though. Many VCRs only have yellow/white RCA jacks for video and one channel of audio respectively. Finding a VCR with Yellow/White/Red RCA jacks for video and stereo audio is a preferred path to follow.
Advanced options
If a regular VCR is not for you...
S-VHS
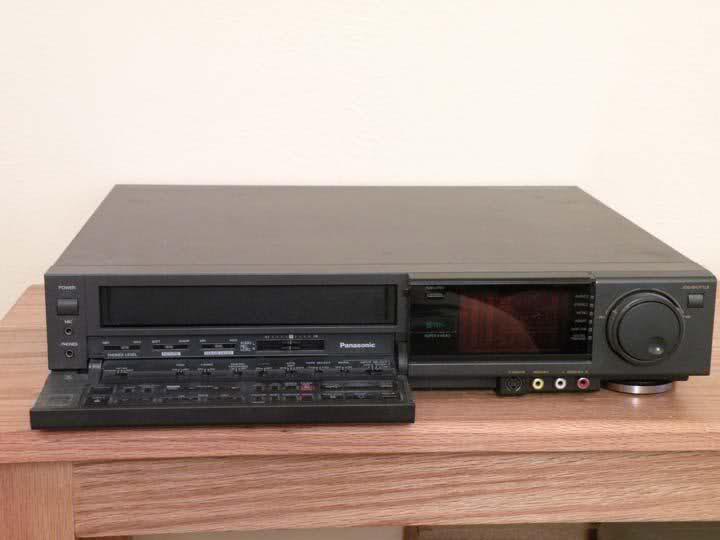
Are there VCRs with S-Video (separated chroma/luma signal connector)? Well, yes and no. While there may be consumer VCRs with s-video out, I am unaware of any. Now if we talk about S-VHS VCRs, the answer is yes. For the unaware, S-VHS was an updated VHS format that exists at a higher quality than VHS and was used mainly for consumer/professional recording. S-VHS players have S-Video output in addition to standard composite video output and are available in both consumer models and professional models. They are less common than standard VCRs but many argue that they are worth the effort to seek out because of the higher quality s-video connection. Professional S-VHS decks are also guaranteed to be of better quality and have more features than their consumer models that may be of use when increasing the quality of your tape during playback. A worthwhile player to check out if you ever get your hands on one. Notable brands are Panasonic and JVC.
There are disadvantages to using s-video, though. Later in this guide I will be talking about hardware video processing. Many of these components are composite video only, making users either find an s-video counterpart or abandon use of the processing hardware (though some effects can be mimicked using software modification). If you have interest in the composite only components, an S-VHS deck still serves as a good investment because of its quality and reliability.
Multi-System
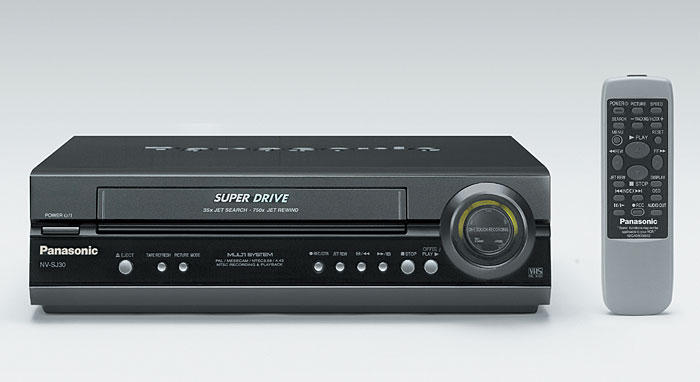
If you have tapes from different regions, a Multi-System VCR may be just what you need to manage all of your NTSC, PAL, or SECAM tapes. That's right, you can get a VCR that plays tapes from any region you need it to. Playing a tape from a different region in your standard VCR will result in a garbled picture that is unrecognizable. Though Multi-System VCRs are a bit more pricey, they can be a great tool for playing any VHS tape you throw at them.
Additional Questions
How about one of those combination VCR/DVD recorder units? You may think that you have stumbled upon a wonderful gizmo, but it is notable that one should stay away from VCR/DVD recorder combination units. These units are often made of cheap components and offer no way to modify the video signal from the VCR before it is recorded (This will be covered later). If you will not be using the built-in DVD recorder in the combination player, it may be acceptable to use the VHS portion but otherwise you may run into recording problems down the line.
Do heads make a difference? You may see a lot of VCRs labeled "4-Head," "6-Head," "8-Head," or even "Flying Erase Head," but what does this all mean? It may not be easy to provide a simple explanation. VCRs first came into play with two heads, optimized for playing SP video (Standard 2-hour speed). People then wanted to get more time out of their home recordings, so a 4-Head player came into play to handle longer running times, as well as better slow motion handling, freeze frame, etc. From this, some players were optimized for 4-Head use meaning that simple SP video playback was slightly degraded. So while early 4-Head players may not handle SP tapes the best way, the technology is cheaper for newer players, and they should playback your SP videos perfectly. LP or SLP/EP recordings should take advantage of 4-Head technology or better. When considering "Flying Erase Head," this label is common for a VCR that is meant for editing purposes and has this head before the recording head to erase tape before it is recorded. While "flying erase head" and "6/8-Head" players may not be necessary for playing back SP tapes, this might signify that the player itself is of higher quality because of the inclusion of more professional features. "6/8-Head" are also rumored to be able to defeat copy-protection, which might make them more desirable.
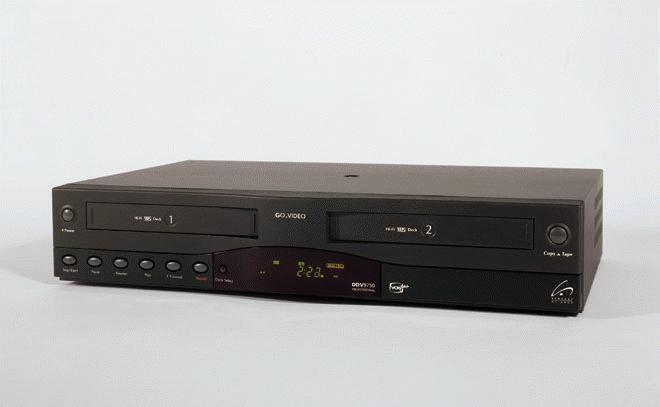
How about these multi-deck VCRs? Personally, I own three dual-deck VCRs, all made by GoVideo. The name may not be something off the shelf of your local electronics store, but don't let that throw you. These decks are well built and often have interesting features that will want you to take advantage of them even if you are not using them to rip movies. Some earlier models will circumvent copy protection in tape-to-tape copies, while later models (forced by law to obey copy protection) contain editing features like flying erase heads, direct tape copy, automatically editing out commercials, slow motion, audio/video dubbing, quasi S-VHS playback, and manual tracking.
Are there any special features I should keep a look out for? Any VCR with manual tracking is a good one to pick up, even if it is just for stubborn tapes. While I personally rely on Auto-tracking for most tapes I play, there are a few that need some additional tracking adjustment. VCRs with self-cleaning heads are also a good investment. These VCRs clean the heads every time a tape is inserted allowing for clean picture with every play and not having to use a cleaning tape every once in a while or open up the VCR and manually clean the heads.
Time Lapse VCRs? If you found a VCR labeled "Time Lapse" (and possibly in an odd color like white) then you have a VCR meant for security purposes. Time Lapse VCRs were popular for recording security camera feeds over a long period of time by capturing the video in intervals. If you set the VCR to capture one frame a minute, you could record continuously for 40 days using one VHS tape (pretty cool, huh). These VCRs originally and still retail for hundreds of dollars, but don't serve as something popular in the ripping world.
Purchasing your VCR
So these days, you usually cannot go down to the local electronics store and buy a VCR. Sure, you might find a combination unit, but these are not really what we want out of a player. So now where do you turn to? There are a few options.
First you want to make sure you use a good brand. Many people recommend Phillips based on the picture quality. Other common brands are Sylvania, Sony, JVC (another favorite brand), RCA, Panasonic, Samsung, and a bunch more.
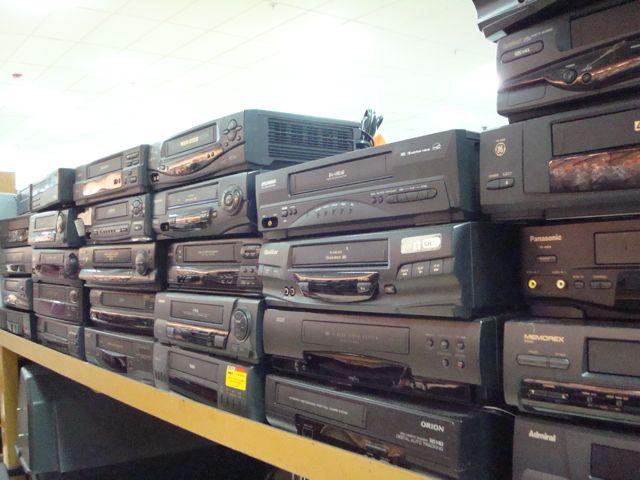
If you are looking for a regular VCR, nothing beats resources in your area. Flea markets, swap meets, rummage sales, yard sales, boot sales, auctions, garage sales, thrift stores, and even the trash. I have personally pulled working units out of a trashcan at a flea market, and have also taken a few from people's trash on the curb. VCRs are so cheap that people cannot give them away. If you don't want to get your hands dirty in this way, flea markets and yard sales might be a good method for you. Usually VCRs can be had for as low as $2 though some people ask for far more. You shouldn't pay too much for a used VCR, though if you can find an interesting model with S-VHS capabilities, it might be worth it to shell out a few more bucks. Remember though, buying stuff from places like these offers no return ability so make sure you are willing to put up with a loss and buy everything as-is, no matter what the seller says. If you don't want to take as many risks, thrift stores are a good place to go. Goodwill stores in particular are a great place for VCRs, which usually range between $3 and $6, with a week-long return policy. Plus, they are always getting in new stuff.
You can also go the online route. The first though that comes to mind in this regard is Ebay. Ebay can be a great place to find rare equipment like S-VHS decks and Multi-Systems. You do have to take the shipping into consideration though, and this is often as high as the asking price on some of the decks you will find. Craigslist can also be a great tool for finding old electronics, but always make an effort to try the VCR before you purchase it. Online retailers can also be an invaluable resource. While they are more expensive, you will get a new product and usually a warranty.
It may also be a good idea to buy more than one VCR. VCRs are known to break down and they are cheap to replace. It may also be of value to have multiple VCRs to see how they handle the same tape. One tape could play better on one VCR and another tape could play better on another VCR. I have personally had audio problems playing a tape from the 70s on a VCR from the 2000s, but have no problems using a mid-90s VCR. Every VCR is different.
Choose your Capture Device
There are many ways to get the tape from your VCR to your PC. Finding the right one for you might take a little work. You not only have to take price into consideration with these, but ease of use, technical compatibility and hard drive space. Some of these devices are easy to use while some get more advanced. Some only work with certain operating systems as well, or have drivers for only an old version. Hard drive space needs to be considered as well. DVD Recorders will make your video fit on a DVD-R (about 4.4GB) while a dump from another device to your computer could leave a file over 100GB in size. Not only does it take up a lot of space, it can strain your computer's resources. Be sure to consider each option before deciding what works best for you.
DVD Recorders
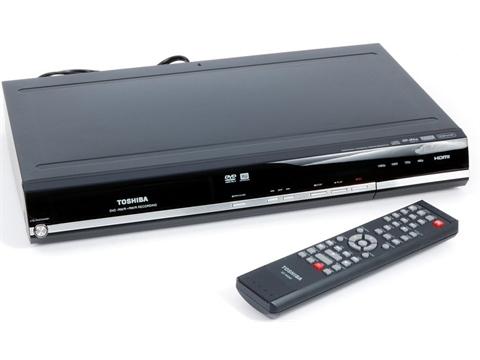
DVD recorders are a popular method of capturing VHS. These recorders look and act like standard DVD players, but they have a built-in burner and A/V inputs. Most models have audio in, composite video in, and s-video in, so the majority of your devices will be covered. It is good to have one with a variety of recording modes. One hour, two hour, four hour, and eight hour are standard. This allows for you to dial in on the best encoding vs length. As just stated, the downside to a DVD recorder is that you convert the tape to Mpeg2 (the DVD copy) before converting it to XviD/x264. This idea may turn some people off, but other die-hard videophiles swear by the method and prefer having a DVD to work from instead of a load of uncompressed data on a hard drive.
When choosing a DVD recorder, go with name brands such as Toshiba or Samsung. Prices vary and can go as low as $10 for a used model or a few hundred dollars for a newer shelf model. Some models even have the ability to hook in a hard drive and edit the video before the DVD is burned. I personally use a DVD Recorder for my rips.
Digital Video Converters
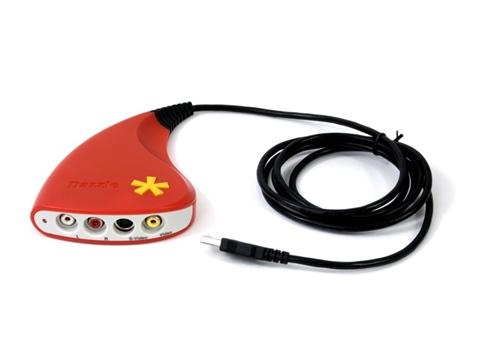
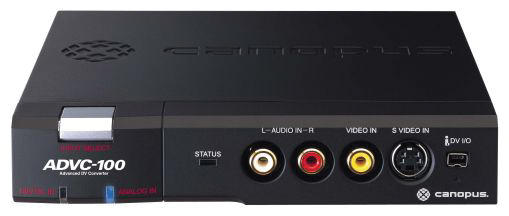
These converters are popular for those wanting to go the direct-to-pc route. Basically, you buy one of these gizmos and hook in your video (composite/s-video) and audio and they digitize the video and feed it right back to your computer over USB or Firewire. Some require their own power supply while others use power right from the computer. These devices may have their own specialized software which could make capturing difficult depending on the computer you use.
These usually come in high end and low end flavors. You can spot a low end model by the price. $10 to around $40 will get you a little USB powered connector with all of your audio/video inputs on them. Names you might see here are Ion, Dazzle, and EasyCap. The majority of opinions about these devices is that they should be avoided. That said, they may work for you and they may not. There are tons of driver issues depending on your operating system and some are so cheaply made they may not work at all. I have personally used a Dazzle unit but found it hard to use and impossible to get working after switching to a new computer. Some may be drawn in by the "plug and play" appeal of these units but you should research them before using.
On the high end we see devices that cost $90 or above, sometimes as high as a few thousand dollars. These devices are similar to the low end models wherein they have a/v inputs, but they are also more robust and may have some built in video processing features. These models usually require their own power supply and connect to your computer with Firewire. A favorite brand is Canopus (the ADVC line) which has a wide range of supporters, and some earlier models have tricks for bypassing copy protection. The ADS Technology 'Pyro' is also said to be a robust model that ignores copy protection.
Capture Cards
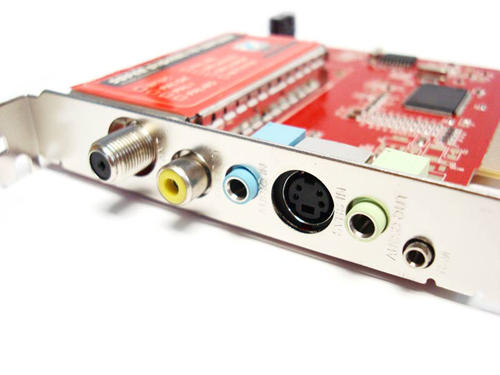
Many people out there might have older PCI capture cards. These cards go right into a card slot on your computer's motherboard and allow you to plug video sources directly into them. This may not be a good choice for someone without a lot of computer experience or a fear of computer damage though the installation process is an easy one. These cards can run anywhere from $10 to a few hundred and usually capture in an Mpeg 2 codec. Common brands are Canopus, Pinnacle, and ATI. Note: depending on the age of your card, you may or may not have a built in audio input. You may have to rely on your computer's built in line-in jack or an additional sound card, most of which are relatively cheap.
Camcorders
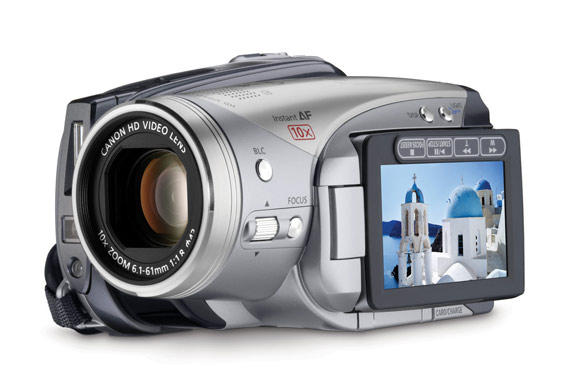
Camcorders!?! Huh? Yep, camcorders can be more than just a good way to capture family moments. Some MiniDV camcorders (among others I'm sure) offer what is known as a pass-through option. I'm sure that you are familiar with camcorders having Audio/Video output to connect to a television, but some models allow you to input into the camcorder as well. By doing this, you can run the video through the camcorder and dump digital video out using your camcorder's computer interface (usually a firewire cable). This can be useful as it will circumvent some forms of copy protection, and you might be able to capture with a gadget you already have.
Digital Video Recorders / Personal Video Recorders
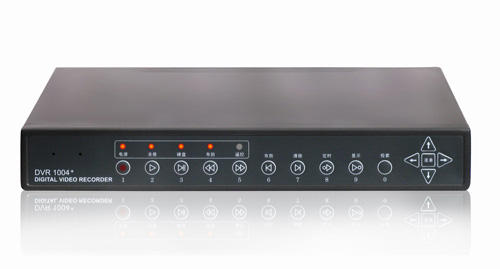
You probably know of Tivo as a DVR, but there are other DVRs that could assist you in backing up your tapes. While most DVDRs require a timer-based recording, you may be lucky enough to find one with anytime recording and composite/s-video inputs depending on what you need. Many of these devices allow you to hook up a USB thumb drive or external hard drive for capturing allowing for you to work with the capture files on a computer later.
Dealing with Copy Protection
Most tapes of major films from the early 1980s on have a form of copy protection called Macrovision (sometimes called MV for short). If you try to record a tape and get a "Cannot copy" message from your recorder or notice the color changing constantly, you have fallen prey to the Macro beast. This was originally designed to stop people from doing tape-to-tape copies but still holds strong as a deterrent for people wanting to make digital copies of their older analog tapes.
There are three levels of Macrovision protection. Level I produces voltage spikes in VBI lines of video (the off-screen portion of video that holds closed caption information). Digital video recorders will detect these spikes and display a message that the source is copy protected, and VCRs attempting to record a movie with level I protection will try to compensate with their automatic gain circuitry and fail, producing a picture that wildly changes brightness. Level II protection used a process called "colorstriping" which inverted the analog signal's colorburst and causes off-color bands to appear in the picture. Level III protection added more colorstriping techniques.
But my tape isn't copy protected, so I cannot run into problems right? Wrong, on some worn VHS tapes, digital video recording devices will think that the tape is protected and refuse to make a copy. This means that some of your home movies could be un-copyable using some methods of digital capture.
So how can you make copies of protected tapes? First off, it is important to know that you cannot tell what tapes have what level of protection. A lot of older electronics meant to remove one level of copy protection may not work on others. To test my gear, I use a newer tape from 2003. The logic with this is, if I can break the protection on a tape this recent, there is a good chance that older tapes will have no problem
NOTE: From my findings, because I can make a tape-to-tape copy does not mean that I can create a tape-to-digital copy. I have some hardware that lets me duplicate tapes nicely, but won't let me record to a DVD even if I use the duplicated video. Since some things I will be going over here are older ways of removing protection, it might take more research to find out what will work for you.
Use What You Already Have
Sometimes, what you already have may already rid you of copy protection. Some DVD recorders may ignore macrovision by default, and some digital video recorders (early Canopus models) have a trick where you hold down a button and tilt the unit back and it will ignore copy protection. The best thing to do here is to Google the name and model of your component with the word "macrovision" and see what comes up.
Check your television for video out. While most televisions have an audio out, some also include video out which can provide a macrovision free signal. But how is this possible? Televisions are made to ignore the macrovision signal (though early ones recognize and react to it). Video out from a television will usually give you a clean signal how the TV displays it. Notably, some LG televisions are said to have video out capabilities, but check your television as well even if it is not this brand.
Coming back to DV camcorders again, using the pass-through method which I described above allows you to dump the video to your computer directly, in a digital video format which is easy to re-encode. This method has been said to completely remove all traces of macrovision, as the computer will treat the video as if you recorded it to the DV tape yourself.
Some professional S-VHS decks will also chew right through any media with macrovision, so if you are lucky enough to have an S-VHS deck of this variety, you may be set with your copying.
Hokey Methods
Some of these methods sound completely strange while others sound plausible but have little to back them up. I supply these for you to try out, and hopefully help prove right or wrong.
Some people say copying VHS from a standard VHS player to one labeled "VHS HQ" will remove copy protection.
Older models (mostly top-loading) of VCRs are said to not have the components to properly react to macrovision thus making them completely ignore it. Others say that because most of these older players have a manual tracking knob that goes above and beyond the abilities of manual tracking in modern VCRs, the tracking is able to correct the protected signal if adjusted properly.
One source says that a simply A/V switch to go back and forth between composite/s-video sources has defeated copy protection.
VCRs with 6 or more heads may defeat copy protection, the logic being that more heads can minimize the fluctuations caused by the signal while making a recording.
Some people believe using the input function on a VHS camcorder will allow you to make unprotected copies using the record feature of the camcorder.
Using an old GoVideo dual-deck VCR will allow you to make tape-to-tape copies with no macrovision, but whether these tapes can be converted to digital is unknown.
What Does NOT Work
Betamax conversions do not work. Copying your VHS tape to Betamax will make you think the copy protection is gone, as the copy will play back perfectly on your Betamax machine as if it were completely clean. However, copying the beta tape back to any other format will cause the copy protection to come back on you. Why? The Betamax player will not recognize the macrovision signal because macrovision was not meant for use on beta tapes. Even though the player doesn't know how to react to the signal, it is still there and can be passed on down the line.
VCR-to-VCR copies do not work. This is exactly what macrovision was designed to prevent.
What DOES Work
If you are going to copy macrovision protected tapes, and don't already have any methods of doing it, there are two routes you can go. You can either go for a Digital Video Stabilizer or a Time Base Corrector. It is important to note that there are a variety of "macro boxes" or macrovision defeating units from the 80s and 90s. I have heard that some older Vidicraft stabilizers still work for digital copying though I'm not sure. I have also tried a Sima Video CopyMaster SED-CM which makes perfect VHS duplicates but will not let me do digital conversions. If you are going for a stabilizer, the word "digital" before it is a safe bet that is will work.
Note: For you do-it-yourselfers, there are schematics available online to build your own macrovision defeating circuit. Just do a Google search for "macrovision removal plans" or something similar and do some digging in the results list.
Digital Video Stabilizers
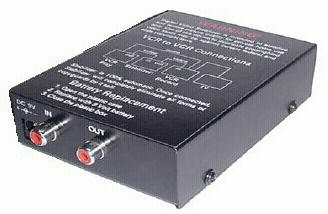
There are a lot of these out there, in a wide variety of shapes and sizes. The most common (and probably inexpensive) of these digital video stabilizers come in a rectangular black case. They have the word "WARNING" in red letters on the top followed by some writing and a VCR cabling diagram. I personally use one such box and though I have some problems with it, it is not that bad. These range from $20 to $50 and can be found at online electronics retailers, or Ebay. These models usually come with an input jack, an output jack, and a 9-volt battery. Some models will also have a jack for a 9-volt DC adapter. Now, my problem with this device is that it is a bit cheaply made. I promptly broke the composite in jack upon first using it, though I had enough soldering skills to know how to reconnect it after opening it up. The moral is, be gentle.
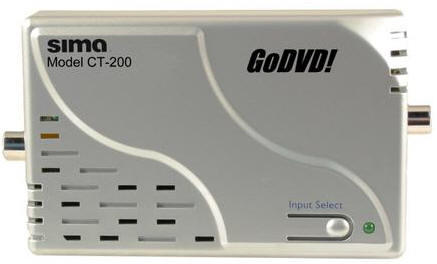
Other devices include the Sima CT-1 (known as CopyThis!) and the Sima CT-2 (known as GoDVD). From what I hear, these are great devices, but can go as high as $200 on ebay and are no longer in production. If you have one, by all means use it, but you can probably find a cheaper device that does the same thing. Other good options are the DVD Red Pro, and the Vidicraft Play-Right Digital Stabilizer.
Digital Video Stabilizers can also be used legitimately to stabilize your video picture for any reason, not just copy protection. Even if you do not have a copy protected tape, it may helpful to use a digital video stabilizer to clean the video signal.
Time Base Correctors (TBCs)
Time Base Correctors are usually broken down into "full" correctors and "partial" correctors. Now, a full time base corrector can cost a lot of money as it is a device usually meant for professional video studio use. The practical reason for a TBC is to mix older "messy" VHS with newer time stable equipment that may be confused by the VCR's signal. This cleaning up the signal by correcting sync has a side effect of removing macrovision. But how? A TBC strips down and rebuilds the video signal before piping it out to other components, and can be a big help even on videos with no copy protection (as with digital video stabilizers). Some full TBCs can cost as high as several thousands of dollars while lower-end devices are still placed around $200 and up.
Partial TBCs are exactly as they sound, a device that will correct the video sync, but not as cleanly or professionally as some higher models. Some partial TBCs include the Videonics Video Equalizer. The Sima Video CopyMaster I mentioned above is also considered by some to be a partial TBC. It has been said to be good for handling more delicate sources that a full TBC may rip apart while trying to repair.
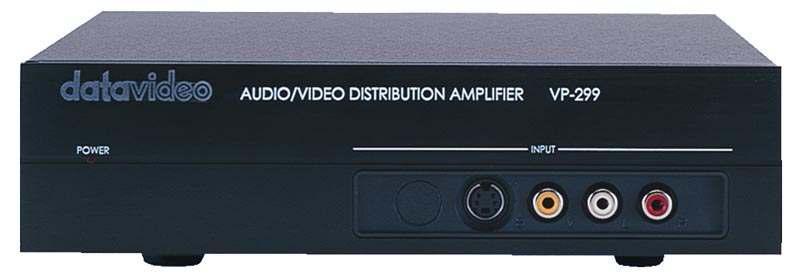
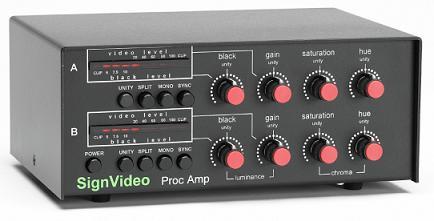
Full TBCs are much better than partial TBCs and can still be found at reasonable prices. Good names in this department are Datavideo, Microtime, and Kramer. Many TBCs can also be bundled with video processors (which I will get to in a bit). For these, a good name is SignVideo which was formerly called Studio1 (which is rumored to be s new incarnation of Vidicraft). These TBC/processor combos retail at $450 but can be found on Ebay used for under $100 from time to time. These are highly recommended, and even come in the dual variety with one TBC/processor placed directly on top of another.
TBCs may be a good option for long term ripping setups, but are unnecessary for one or two tapes.
Enhancing Your Video
So you have your VCR, you have your capturing device, and you have your macrovision defeater (if you need it). So what else can you do to make your video look the best? This is a section on using hardware devices to enhance your video. Now, there are software enhancements you can use, but I prefer to go the hardware route. Why? For one, using a ton of software enhancements can cause you to encode forever. I have had files encode, at maximum priority, for over 24 hours straight using software filters. When using hardware, it just sits between the VCR and capture device, giving you no extra time. I also feel that you can get better control when you use hardware, some of which is truly great at what it does and cannot be replicated on a computer. That said, I'm sure that there are computer effects that cannot be done on hardware. It is all up to you to decide what is best, and you can use them in combination if you want as well. At the end of the day, some of the best rips are done just straight from your player to your recorder. Its all up to you to figure out what works from source to source.
Note: For those s-video guys out there, s-video didn't come into popularity until the mid 1990's so you might have some trouble finding s-video compatible devices. A lot of this hardware boomed in the 1980s before s-video was a standard.
Processing Amplifiers
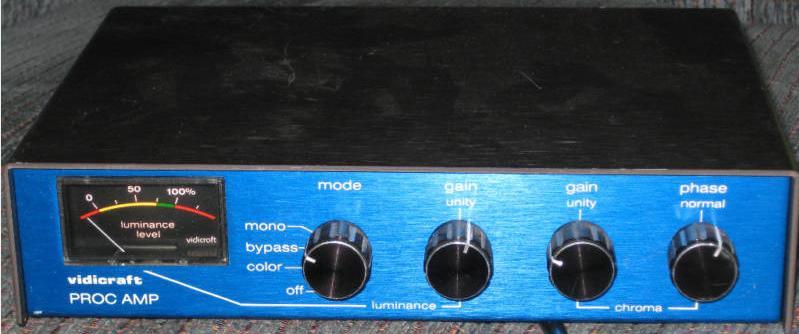
Processing Amplifiers, are also known as Proc Amps, Color Correctors, Video Enhancers, and Video Processors. Now I talked about TBCs previously, and it is important to note again that most TBCs also have a proc amp built in. I highly recommend a unit of this type if possible. Proc amps can be found in consumer varieties all the way up to professional broadcasting equipment. They are usually self-powered boxes with composite or s-video inputs/outputs and occasionally audio inputs/outputs which let you modify and fix the video appearance. It is important to note that many people choose to bypass these audio ports. Plugging audio from your VCR to these will do nothing to fix them, so it is best to just plug the audio from your VCR directly into your capture device.
Now, processing amplifiers usually have a number of standard features that might remind you of your own television's adjustments. Look for contrast, color, hue, and brightness. Every proc amp has a different names for these adjustments, so be sure to do some experimentation to find what is what. Proc amps also usually have several modes for color video or black and white video. Some units have fade in/out, built in stabilizers, and one or more comparison features. Some of your proc amps might have a mode called "bypass" which will give you the video with no modifications. This is so you can switch back and forth between bypass and color/b&w to see how you modified the image. Later proc amps have a feature called "comparator" which lets you divide the screen for a before/after look with your modifications.
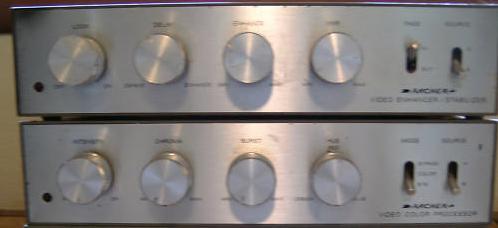
Professional models will have more options for phase, black level, sync, burst, and others from model to model. What is interesting is that some of these professional features may trickle down into consumer level gear. Take for instance early Archer (RadioShack) processors. Archer released both a Video Enhancer/Stabilizer (with lock, delay, enhance, and vnr) as well as a Color Processor (with intensity, chroma, burst, and hue). When used in chorus, these two proc amps can be combined to form a beefy processing chain.
Even Archer models originally retailed for over $100, but can be found for a fraction of that today. Good names to look out for are Sima, Vidicraft, Videonics, Kramer, Leitch, Elite Video, Archer, JVC, Sony and Microtime. The Sima SCC Color Pro is notable because it has a built in stabilizer and s-video compatibility. Vidicraft products are also a personal favorite because they are very powerful and very well built though they only have composite inputs/outputs. Vidicraft itself is an interesting company, and their units feel like professional products (who needs 4 video outputs?) but aimed more at a hobbyist or semi-professional. For you s-video guys, look no further than the Elite Video BVP-4/BVP-4 Plus. These things are only s-video compatible and are apparently the best of the best for processing video. Proc amps can be found in working order for as low as $1 and as high as $80. When choosing a device, be careful as some will only work with a special power adapter, though most are hardwired.
Detailers
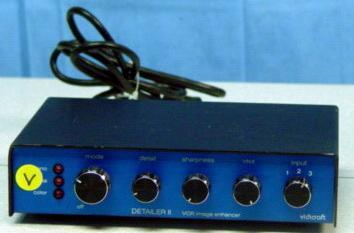
Some processing amplifiers have sharpness functions, but I recommend a standalone detailer. These devices can work wonders at sharpening a video and restoring detail to a worn print. I personally have a detailer by Vidicraft with detail, sharpness, and VNX (variable noise reduction for reducing grain when detailing) settings and it can really boost a video to top quality. Some also have a comparison function similar to proc amps which can help determine how much to detail the picture by switching between your modifications and the original source. There are also usually selections for color or black and white video similar to proc amps as well.
Now I already said that I use a Vidicraft detailer: the Detailer II. Many people flock over the Detailer III and the Detailer IV (both have s-video support to my knowledge) but I'm fine with the older model. Vidicraft also released some proc amp/detailer combination units that might be a good investment if you don't want to do any mixing and matching.
Detailers can be found as inexpensively as $1 and go up to around $50. Good names to look for are Vidicraft and Muntz.
Audio Modification
I already said to make sure you don't run your audio through a video processor, but what about audio processors? This is really up to you, as I think software audio processing may be a bit more precise than hardware, but there are still audio processing boxes out there.
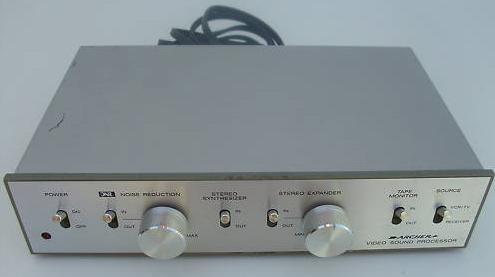
Going back to Vidicraft, they released some proc amps with built in audio functions. Another piece of hardware worth considering is the Archer Video Sound Processor with noise reduction, stereo expander, and stereo synthesizer (for converting a mono source into simulated stereo track). There are also switches for dubbing in sound from other sources.
You can have a go at these boxes if you like, as they seem to cost around $10 to $20, but I don't know much about them.
Good audio editing programs on the PC include Audacity.
Before You Capture
So you have the VCR, the capture device, and the macro box, processor, and detailer if you want them. What else do I need to check before I record?
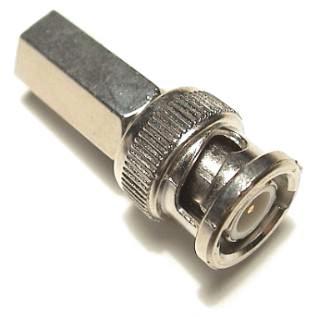
For one, make sure you're cables are all decent. I'm not saying go out and buy Monster cables, but make sure you didn't cut the cable and tape it back together, and make sure the connectors are not faulty. Also make sure you have the connectors you need. Keep s-video with s-video and composite with composite. DO NOT use an adapter to convert s-video to composite or composite to s-video. These do not work too well and are thought to degrade quality more than anything. If your video processor happens to have a strange connector, it is probably BNC which is a professional connection usually for coaxial cable. You can buy an adapter to change this to RCA really inexpensively, though you need to stick with composite.
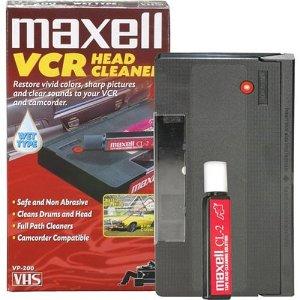
Make sure your VCR works and is clean. Put in a test tape that you don't care about to make sure it does not eat it. It is better to ruin a junk tape then whatever you are trying to capture. If you have a model without automatic head cleaning, consider cleaning the heads of the VCR by either opening it up and cleaning (gently) with alcohol and Q-tips or with a wet cleaning tape.
For your capture device, make sure it is set up how you want it. For a DVD recorder, make sure you use good blank media (Verbatim are a favorite). For camcorder pass-through, have a good dumping program like WinDV or StoikCap . For capture cards you may want to look into something like iuVCR or virtualVCR . For your digital video converter, make sure the drivers are installed and your capture program works (I believe most of these come with their own software).
Make sure your macro box has a working battery or power supply.
Make sure all your processing gear works. Sometimes the RCA jacks are a bit faulty, so jiggle the cable if no signal comes up at first. As for how you should order the chain, many like to do VCR --> macro box (stabilizer)/TBC --> proc amp (or two) --> detailer --> Capture method.
To get the most out of your proc amp/detailer, we are going to need to do a test. First, turn the units on and place all the knobs at the default positions. Start playing your tape (but don't record yet) and pause it at what you think is a particularly messy part. Now slowly twist the knobs to get the best picture. When you think you have it down, play the video and watch to make sure the picture is still smooth and as you want it. If not, rewind and repeat the test.
Lastly, turn off any nearby device that can cause interference. This includes other media playback devices, cell phones, speakers, and anything else you might think could be a problem. Better safe than sorry.
You can capture now :) (Start recording with your cap device and hit play on the VCR with the proper tape inserted)
After Your Capture
Rewind your tape, and do whatever you want with it. Might be a good idea to save it in case you want to re-rip for whatever reason. Reset your proc amp/detailer to the default position to turn it off, and unplug your macrobox from the video cables and power cable if applicable.
Finalizing your Rip
If you used a DVD recorder for capture, go into the recorder's menu and label your DVD and then finalize it. Finalizing it is very important, without it your computer cannot recognize it.
On the Computer
Now if you did anything other than the DVD Recorder method, you should have the video file on your computer nice and ready for you. If you don't and have a DVD, you will need to find a separate guide for ripping a DVD to your computer.
I will also not be covering encoding, as many others here have created fantastic guides on the topic, but I have a few pointers. Make sure your video is deinterlaced or ivtc'd as needed. Also, be sure to do proper cropping (remove the VHS tracking line in the image) and correct the aspect ratio as necessary. It is also important to point out that your encoding application may have several filters to help out your encode, such as a color equalizer, sharpen, denoise, etc. It is a good idea to play around with filters and see what works and what doesn't. Experimentation will get you far.
Closure
So if you made it all the way through this rough guide, thanks for reading and I hope it helps a lot. You are now a VHS ripping guru (Put on the hat supplied in your VHS Ripper Association packet).
