How to Rip Laserdisc
So you have a stack of laserdiscs that gather dust next to your LP collection. Some of these laserdiscs may be rare movies which have never seen DVD yet alone Blu-ray. Some of your laserdiscs might even contain commentaries that were held away from DVD or extra features available nowhere else. Ripping from laserdisc takes a lot more effort than ripping DVDs and possibly even more than a VHS rip depending on what features you want. Though it takes a lot of work, a laserdisc rip can make a unique and memorable addition to anyone's collection.
Contents
Choose your Player
Basic Player
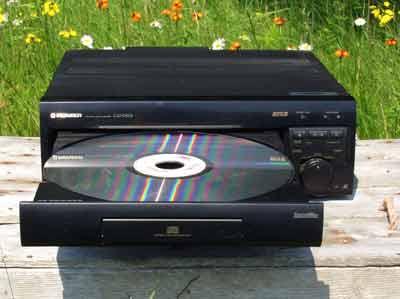
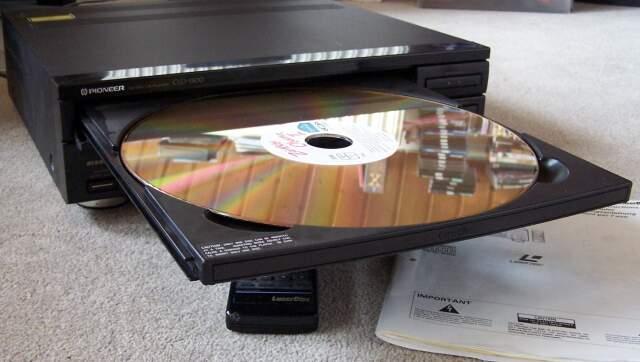
There are not that many options when it comes to choosing a laserdisc player. The most basic you may see is a single-side player with composite video and stereo audio out. The first LD players were top loading, meaning the top of the player popped up and allowed you to input a disc in the fashion of a portable cd player. Later LD players have a tray in the style of a DVD drive in a computer. Does this make a difference? Well yes to an extent. The top-loading laserdisc players use an orange gas laser to read the discs. These lasers have been known to exercise better playback in certain types of discs, however they are more prone to breaking and the components of a player of this age may produce a weaker/dirtier video signal. The tray-loading players have more advanced components and more reliable lasers, but also can have faults reading certain types of discs and suffer additional hardware problems with more moving components. Either one of these players should be good enough to rip with.
Advanced options
If a regular laserdisc player is not for you...
Both-Side Playback
Laserdiscs have two sides. Depending on your region and disc type (I'll be talking about this later), each side can hold around 30-60 minutes of video. So if you have a two hour movie or even more, you could have 2 or 3 or 4 discs to play with 2 sides each. Some laserdisc players offer both-side play. So you don't have to get up to turn the disc over, the player with stop side one and then pick up with side two. These players are very common and you might see these more than players with only one-side play. Note: If you have multiple discs, you still need to go over and change discs after one runs out unless...
Dual-Disc Playback
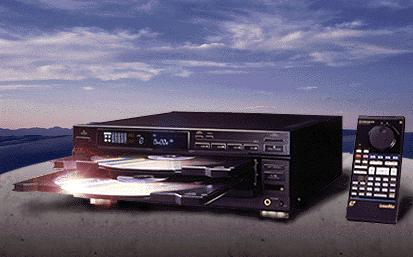
There are rare players that have two disc trays built in, so you can input two discs and it will play from side to side, disc to disc. These units offer little more than convenience and time saving. They seem almost pointless if you have a movie with 3 or more discs that you want to rip, but can serve you as a top-notch LD player.
MUSE Players
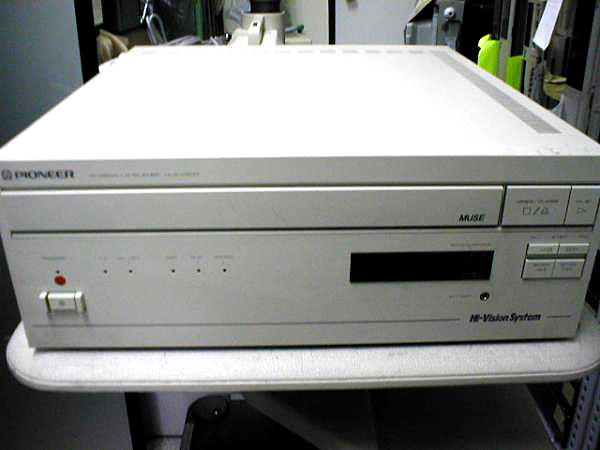
You may come into contact with a Japanese player marked for MUSE playback. MUSE LDs (Also known as Hi-Vision) were high-definition laserdiscs that came out in the 1991. The discs contain video at 1080p (not bad for 1991) and the players are also reported to read standard NTSC laserdiscs. These players make use of a red laser which can read through some disc scratches and some laser rot (which will be covered later).
The odds of finding a player with MUSE compatibility are very slim, and you even need additional hardware decoding if you ever find a MUSE disc to play on it. That said, these players are very high end and can be a great addition to a videophile's collection.
Multi-Region Players
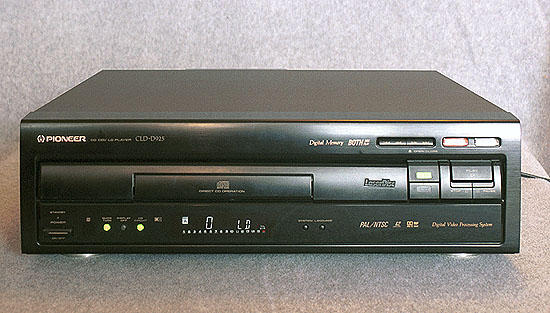
Though I don't believe that they were released in North American, there are Japanese and European laserdisc players that play both NTSC and PAL discs. You can identify these players because they are marked in the front with "NTSC/PAL". These players are more high-end and definitely more expensive, but are the best bet for anyone with NTSC or PAL discs.
Before they made players that supported PAL and NTSC discs, people had to buy both a PAL player and an NTSC player for playing both types of discs. This was apparently a popular occurrence in the UK but I am unsure if PAL players were made available in North America or Japan.
Combination Players
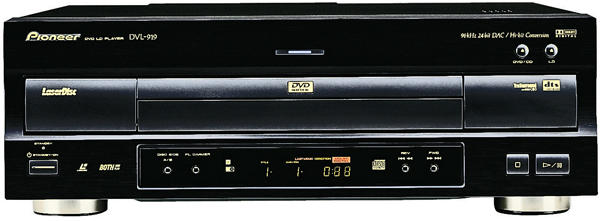
Some laserdisc players can also play other formats. Commonly, I believe all laserdisc players (with the possible exception of the earliest ones) can play CDs and CDVs (audio discs and compact video discs respectively). Other players can offer even more options such as DVD playback, a 5-CD changer, or even Karaoke support. If you want to cut down on the number of components you have, getting a combination player may be for you.
Additional Questions
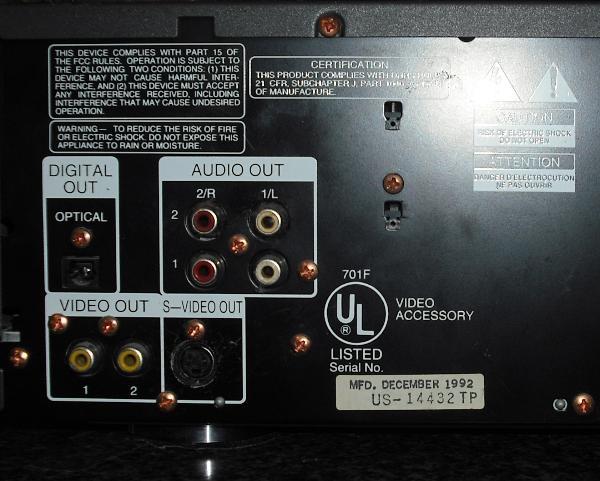
S-Video or Composite?
Most laserdisc players offer both composite video out and s-video out. You may have happened upon a player with only composite out. Are you missing something? Well yes and no. Most people will tell you to go all out for S-Video and ignore composite, especially for something like VHS ripping. However, this is not always the best option with laserdisc players. LD players are natively composite, which means that the video is read with the chroma and luma already combined (the opposite of a VHS deck). So any s-video taken from the laserdisc player is actually a split signal using the laserdisc player's own comb filter (separates the chroma from the luma). Now, many argue that you should NOT use s-video out from an LD player because any device you use now for decoding the signal (your TV for example) would have a better comb filter than what was available when your laserdisc player was manufactured.
Now there are exceptions to this rule. High-end Japanese players (Pioneer's CLD-R7G, LD-S9 and HLD-X9) use a comb filter that is thought to be the best ever put into consumer gear.
When choosing whether or not to use composite of s-video, the best thing to do is to try them both out and use your eye to determine what looks better.
What's with all the audio options?
Laserdisc players can have a ton of audio output options. Digital Out, stereo RCA out, mono out, DTS, the list goes on and on. While you may want these audio options for your home theater setup, you really only need the stereo RCA jacks for ripping laserdiscs.
Purchasing your laserdisc Player
So these days, you usually cannot go down to the local electronics store and Laserdisc Player. So now where do you turn to? There are a few options.
First you want to make sure you use a good brand. I can recommend Pioneer and Phillips though the majority of LD players will be made by reputable manufacturers. When looking for a player, it might not be called "Laserdisc" but "Laservision" or "DiscoVision" due to licensing of the technology. These players should play your discs fine.
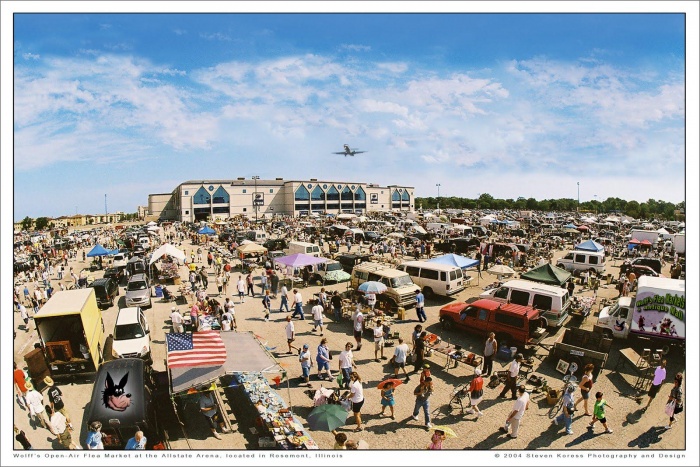
If you are looking for a standard one-side play or both-side play player, nothing beats resources in your area. Flea markets, swap meets, rummage sales, yard sales, boot sales, auctions, garage sales, thrift stores, and even the trash. At these places, you can expect to spend anywhere between $5 and $50 for a player (And usually people throw in their discs as well). Remember though, buying stuff from places like these offers no return ability so make sure you are willing to put up with a loss and buy everything as-is, no matter what the seller says.
You can also go the online route. The first though that comes to mind in this regard is Ebay. Ebay can be a great place to find equipment if your area leaves you high and dry. You do have to take the shipping into consideration though, and this is often as high as the asking price on some of the decks you will find. Craigslist is a fantastic way to find laserdisc players and I have used it with wonderful results, but always make an effort to try the laserdisc player before you purchase it. When using CraigsList, try alternate spellings like "laserdisk" or "laser disk" to turn up listings other collectors may have missed.
It may also be a good idea to buy more than one laserdisc player. They are getting harder to find and it is better to be safe and have a few then have the one you bought break down and be searching for another four months. If you are at a yard sale or a CraigsList sale where someone has two, make an offer on both and you can probably get them for a reduced price compared to if you bought them separately.
Choose your Capture Device=
There are many ways to get the tape from your LD player to your PC. Finding the right one for you might take a little work. You not only have to take price into consideration with these, but ease of use, technical compatibility and hard drive space. Some of these devices are easy to use while some get more advanced. Some only work with certain operating systems as well, or have drivers for only an old version. Hard drive space needs to be considered as well. DVD Recorders will make your video fit on a DVD-R (about 4.4GB) while a dump from another device to your computer could leave a file over 100GB in size. Not only does it take up a lot of space, it can strain your hard drive. Be sure to consider each option before deciding what works best for you.
DVD Recorders
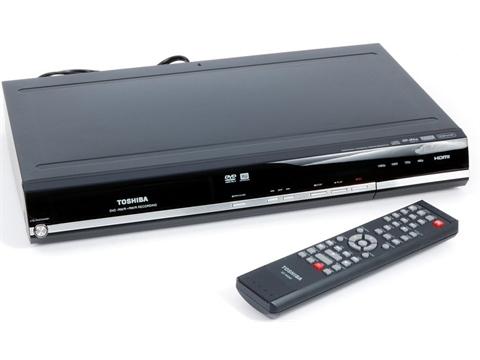
DVD recorders are a popular method of capturing from laserdisc. These recorders look and act like standard DVD players, but they have a built-in burner and A/V inputs. Most models have audio in, composite video in, and s-video in, so the majority of your devices will be covered. It is good to have one with a variety of recording modes. One hour, two hour, four hour, and eight hour are standard. This allows for you to dial in on the best encoding vs length. As just stated, the downside to a DVD recorder is that you convert the tape to Mpeg2 (the DVD copy) before converting it to XviD/x264. This idea may turn some people off, but other die-hard videophiles swear by the method and prefer having a DVD to work from instead of a load of uncompressed data on a hard drive.
When choosing a DVD recorder, go with name brands such as Toshiba or Samsung. Prices vary and can go as low as $10 for a used model or a few hundred dollars for a newer shelf model. Some models even have the ability to hook in a hard drive and edit the video before the DVD is burned. I personally use a DVD Recorder for my rips.
[size=4]Digital Video Converters====
These converters are popular for those wanting to go the direct-to-pc route. Basically, you buy one of these gizmos and hook in your video (composite/s-video) and audio and they digitize the video and feed it right back to your computer over USB or Firewire. Some require their own power supply while others use power right from the computer. These devices may have their own specialized software which could make capturing difficult depending on the computer you use.
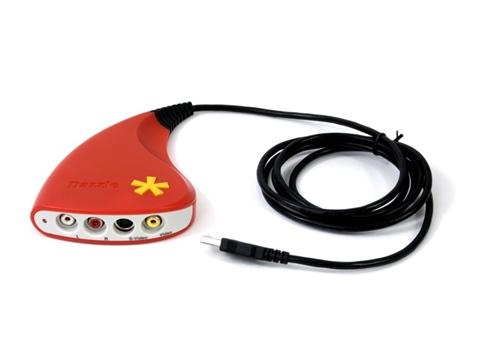
These usually come in high end and low end flavors. You can spot a low end model by the price. $10 to around $40 will get you a little USB powered connector with all of your audio/video inputs on them. Names you might see here are Ion, Dazzle, and EasyCap. The majority of opinions about these devices is that they should be avoided. That said, they may work for you and they may not. There are tons of driver issues depending on your operating system and some are so cheaply made they may not work at all. I have personally used a Dazzle unit but found it hard to use and impossible to get working after switching to a new computer. Some may be drawn in by the "plug and play" appeal of these units but you should research them before using.
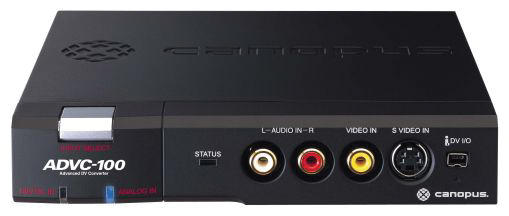
On the high end we see devices that cost $90 or above, sometimes as high as a few thousand dollars. These devices are similar to the low end models wherein they have a/v inputs, but they are also more robust and may have some built in video processing features. These models usually require their own power supply and connect to your computer with Firewire. A favorite brand is Canopus (the ADVC line) which has a wide range of supporters, and some earlier models have tricks for bypassing copy protection. The ADS Technology 'Pyro' is also said to be a robust model that ignores copy protection.
Capture Cards
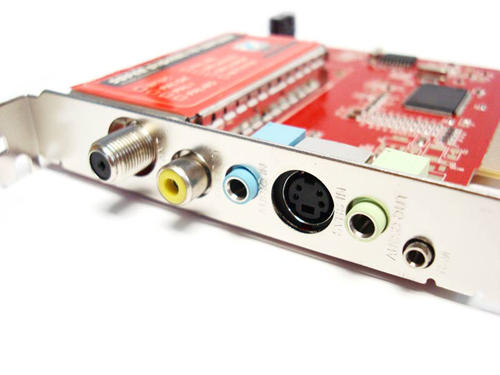
Many people out there might have older PCI capture cards. These cards go right into a card slot on your computer's motherboard and allow you to plug video sources directly into them. This may not be a good choice for someone without a lot of computer experience or a fear of computer damage though the installation process is an easy one. These cards can run anywhere from $10 to a few hundred and usually capture in an Mpeg 2 codec. Common brands are Canopus, Pinnacle, and ATI. Note: depending on the age of your card, you may or may not have a built in audio input. You may have to rely on your computer's built in line-in jack or an additional sound card, most of which are relatively cheap.
Camcorders
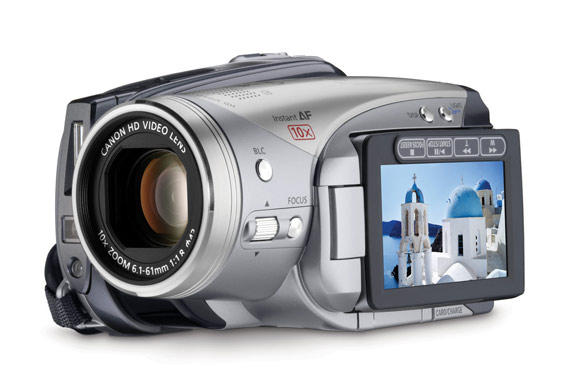
Camcorders!?! Huh? Yep, camcorders can be more than just a good way to capture family moments. Some MiniDV camcorders (among others I'm sure) offer what is known as a pass-through option. I'm sure that you are familiar with camcorders having Audio/Video output to connect to a television, but some models allow you to input into the camcorder as well. By doing this, you can run the video through the camcorder and dump digital video out using your camcorder's computer interface (usually a firewire cable). This can be useful as it will circumvent some forms of copy protection, and you might be able to capture with a gadget you already have.
Digital Video Recorders / Personal Video Recorders
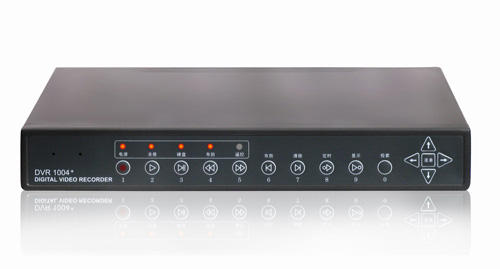
You probably know of Tivo as a DVR, but there are other DVRs that could assist you in backing up your tapes. While most DVDRs require a timer-based recording, you may be lucky enough to find one with anytime recording and composite/s-video inputs depending on what you need. Many of these devices allow you to hook up a USB thumb drive or external hard drive for capturing allowing for you to work with the capture files on a computer later.
Any Copy Protection?
Laserdiscs have NO copy protection at all. You don't need to worry about macrovision at all or anything similar. If you have a macrovision defeater for VHS/DVD, just put it to the side and ignore it while you deal with laserdiscs.
Enhancing Your Video
So you have your laserdisc player, and you have your capturing device. What else can you do to make your video look the best? This is a section on using hardware devices to enhance your video. Now, there are software enhancements you can use, but I prefer to go the hardware route. Why? For one, using a ton of software enhancements can cause you to encode forever. I have had files encode, at maximum priority, for over 24 hours straight using software filters. When using hardware, it just sits between the LD player and capture device, giving you no extra time. I also feel that you can get better control when you use hardware, some of which is truly great at what it does and cannot be replicated on a computer. That said, I'm sure that there are computer effects that cannot be done on hardware. It is all up to you to decide what is best, and you can use them in combination if you want as well. At the end of the day, some of the best rips are done just straight from your player to your recorder. Its all up to you to figure out what works from source to source.
Note: For those s-video guys out there, s-video didn't come into popularity until the mid 1990's so you might have some trouble finding s-video compatible devices. A lot of this hardware boomed in the 1980s before s-video was a standard.
Note 2: If you have a Stabilizer or TBC, it does not help at all to use it for your laserdisc capture. Laserdiscs do not have the flaws that VHS has to facilitate this hardware. For your laserdisc capture, it is better to leave these devices on the shelf.
Processing Amplifiers
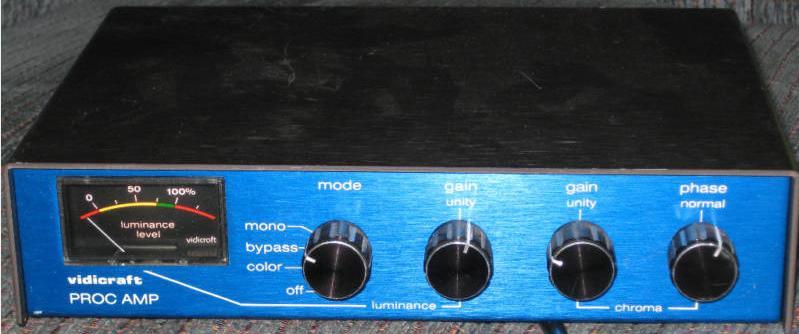
Processing Amplifiers, are also known as Proc Amps, Color Correctors, Video Enhancers, and Video Processors. Now I talked about TBCs previously, and it is important to note again that most TBCs also have a proc amp built in. These may not be totally necessary with laserdiscs, but there are some bad prints out there. Proc amps can be found in consumer varieties all the way up to professional broadcasting equipment. They are usually self-powered boxes with composite or s-video inputs/outputs and occasionally audio inputs/outputs which let you modify and fix the video appearance. It is important to note that many people choose to bypass these audio ports. Plugging audio from your LD player to these will do nothing to fix them, so it is best to just plug the audio from your LD player directly into your capture device.
Now, processing amplifiers usually have a number of standard features that might remind you of your own television's adjustments. Look for contrast, color, hue, and brightness. Every proc amp has a different names for these adjustments, so be sure to do some experimentation to find what is what. Proc amps also usually have several modes for color video or black and white video. Some units have fade in/out, built in stabilizers, and one or more comparison features. Some of your proc amps might have a mode called "bypass" which will give you the video with no modifications. This is so you can switch back and forth between bypass and color/b&w to see how you modified the image. Later proc amps have a feature called "comparator" which lets you divide the screen for a before/after look with your modifications.
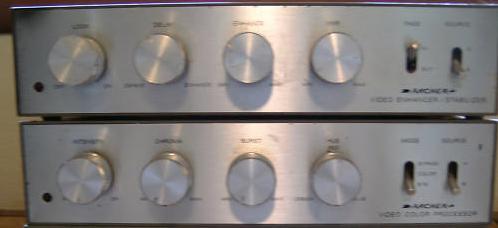
Professional models will have more options for phase, black level, sync, burst, and others from model to model. What is interesting is that some of these professional features may trickle down into consumer level gear. Take for instance early Archer (RadioShack) processors. Archer released both a Video Enhancer/Stabilizer (with lock, delay, enhance, and vnr) as well as a Color Processor (with intensity, chroma, burst, and hue). When used in chorus, these two proc amps can be combined to form a beefy processing chain.
Even Archer models originally retailed for over $100, but can be found for a fraction of that today. Good names to look out for are Sima, Vidicraft, Videonics, Kramer, Leitch, Elite Video, Archer, JVC, Sony and Microtime. The Sima SCC Color Pro is notable because it has a built in stabilizer and s-video compatibility. Vidicraft products are also a personal favorite because they are very powerful and very well built though they only have composite inputs/outputs. Vidicraft itself is an interesting company, and their units feel like professional products (who needs 4 video outputs?) but aimed more at a hobbyist or semi-professional. For you s-video guys, look no further than the Elite Video BVP-4/BVP-4 Plus. These things are only s-video compatible and are apparently the best of the best for processing video. Proc amps can be found in working order for as low as $1 and as high as $80. When choosing a device, be careful as some will only work with a special power adapter, though most are hardwired.
Detailers
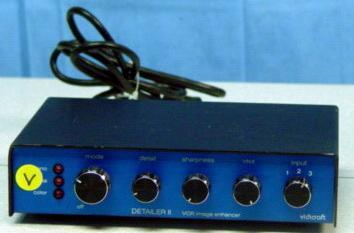
Some processing amplifiers have sharpness functions, but I recommend a standalone detailer. These are very popular for enhancing laserdisc picture during capture, and I would highly recommend one. Detailers can work wonders at sharpening a video and restoring detail to a worn print. I personally have a detailer by Vidicraft with detail, sharpness, and VNX (variable noise reduction for reducing grain when detailing) settings and it can really boost a video to top quality. Some also have a comparison function similar to proc amps which can help determine how much to detail the picture by switching between your modifications and the original source. There are also usually selections for color or black and white video similar to proc amps as well.
Now I already said that I use a Vidicraft detailer: the Detailer II. Many people flock over the Detailer III and the Detailer IV (both have s-video support to my knowledge) but I'm fine with the older model. Vidicraft also released some proc amp/detailer combination units that might be a good investment if you don't want to do any mixing and matching.
Detailers can be found as inexpensively as $1 and go up to around $50. Good names to look for are Vidicraft and Muntz.
Audio Modification
I already said to make sure you don't run your audio through a video processor, but what about audio processors? This is really up to you, as I think software audio processing may be a bit more precise than hardware, but there are still audio processing boxes out there.
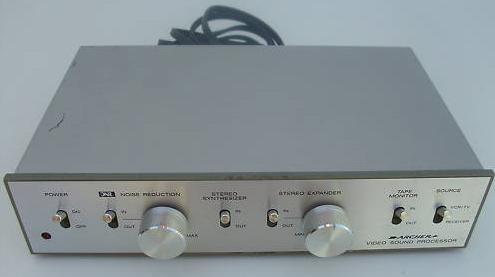
Going back to Vidicraft, they released some proc amps with built in audio functions. Another piece of hardware worth considering is the Archer Video Sound Processor with noise reduction, stereo expander, and stereo synthesizer (for converting a mono source into simulated stereo track). There are also switches for dubbing in sound from other sources.
You can have a go at these boxes if you like, as they seem to cost around $10 to $20, but I don't know much about them.
Good audio editing programs on the PC include Audacity.
Dealing with Laser Rot
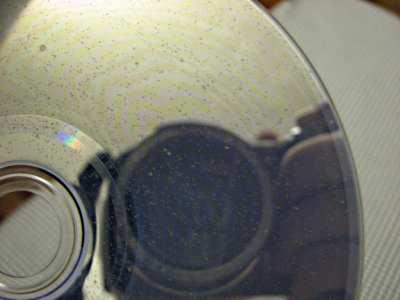
So you may play your discs and notice that there is a speckling across the picture. Usually some rectangular shapes that appear all over for a second and then disappear only to be replaced by more. This is known as laser rot.
Laser rot occurs because some early laserdiscs were assembled with a faulty type of glue. Over time, this glue that holds the disc together can eat through the foil of the disc and cause this picture distortion. On some discs, this is unnoticeable just by looking at the disc, though others can develop a brown "stain". This rot is also not influenced by disc use. You can open a sealed laserdisc and it can already be suffering from laser rot.
So how can you deal with it? Many people believe that a blemish like laser rot can render a disc unusable. Most discs will probably play with rot, though some extreme cases can cause playback problems. If you can play through the disc, there is hope for you.
Some people decide to release their laserdisc rip as is, with the rot still showing, but there are some filters you can use to try to improve the picture. After you complete your rip, check out the Median filters in AviDemux. I have used "Median 5x5" to remove most traces of laser rot, though it does tend to blur the remaining image a bit. Using "Median 5x5" in combination with a sharpen filter might yield better results, giving you a much cleaner picture overall. There is a link for a guide in using Avidemux further down in this guide if you are not familiar with it.
You may have laser rot, but with the right tools you can still get a decent rip.
Commentaries and Extra Features
So you if your disc has multiple audio tracks and extras, you may want to include them in your rip. As for the extras, they usually play after a film or are on the other side of a disc. So you can easily let your recorder keep going and capture these features.
Audio tracks are a bit more complex. PAL laserdiscs have either two analog audio tracks or two digital audio tracks and NTSC discs have two analog audio tracks AND two digital audio tracks (though older discs only have two analog tracks). Now how the audio is handled varies from disc to disc. On older discs that contain commentary, one track is the main audio while the other is a commentary. So the left channel is your first track while the right channel is the second. If you played these both at the same time, you would get both the movie track and the commentary at full volume, together. Now when you make a rip like this, it is best to separate the audio.
After you have your capture file on your computer (coming up in a bit), you can use a video tool like Virtual Dub or AviDemux and to remove the audio and then use an additional program like Audactiy to split the channels up into separate tracks. So you can save the left channel to a mono main film track, and the right channel to a mono commentary track. You can then use these two separate tracks to make a dual audio XviD/x264 file.
Now if you have a 4 track laserdisc, you may have it split up with two main film tracks and two commentary tracks (two for the film, two for the same commentary) or possibly even more split up. Now, for this, you will have to record the audio another way to get it all in your rip.
Set up your recorder to record the film with the main audio tracks and capture (coming up in a bit). Then, you will need a recorder program for your computer to just do audio (I recommend Audacity again) and a RCA to 1/8 inch jack cable to go from your laserdisc player's RCA ports to the line-in jack on your computer's sound card. When this is connected, set your audio program to record from line-in and play your laserdisc with the commentary enabled. After the movie is over, stop the recording and output the file. You can then treat this file as a separate audio track and add it to your video (See the AviDemux guide mentioned later) though you may have to adjust the delay of the track because you started the commentary recording at a different time then the capture (This is easy to adjust and doesn't have to be too accurate with commentary).
Before You Capture
So you have the LD player, the capture device, the processor, and detailer (if you want them). What else do I need to check before I record?
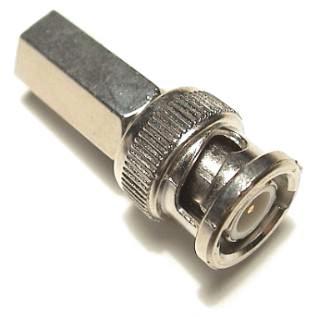
For one, make sure you're cables are all decent. I'm not saying go out and buy Monster cables, but make sure you didn't cut the cable and tape it back, and make sure the connectors are not faulty. Also make sure you have the connectors you need. Keep s-video with s-video and composite with composite. DO NOT use an adapter to convert s-video to composite or composite to s-video. These do not work too well and are thought to degrade quality more than anything. If your video processor happens to have a strange connector, it is probably BNC which is a professional connection usually for coaxial cable. You can buy an adapter to change this to RCA really inexpensively, though you need to stick with composite.
Make sure your LD player works properly. If you are adventurous, you might want to clean your laser. Cleaning the disc is also a good idea, especially if you have purchased it unsealed or not played it in a while.
For your capture device, make sure it is set up how you want it. For a DVD recorder, make sure you use good blank media (Verbatim are a favorite). For camcorder pass-through, have a good dumping program like WinDV or StoikCap. For capture cards you may want to look into something like iuVCR or virtualVCR. For your digital video converter, make sure the drivers are installed and your capture program works (I believe most of these come with their own software).
If you are going the DVD recorder route, you need to decide if you want to record the whole film on one DVD or on separate DVDs. Some people choose to record one side of the laserdisc to one DVD, and continue this for all the sides of all the discs for the film. For this, it is best to use a low recording mode like 1 hour for each disc you make.
Make sure all your processing gear works. Sometimes the RCA jacks are a bit faulty, so jiggle the cable if no signal comes up at first. As for how you should order the chain, many like to do Laserdisc player --> proc amp (or two) --> detailer --> Capture method or even just Laserdisc player --> detailer --> Capture method.
To get the most out of your proc amp/detailer, we are going to need to do a test. First, turn the units on and place all the knobs at the default positions. Start playing your disc (but don't record yet) and pause it at what you think is a particularly messy part. Now slowly twist the knobs to get the best picture. When you think you have it down, play the video and watch to make sure the picture is still smooth and as you want it. If not, restart the video and repeat the test.
Lastly, turn off any nearby device that can cause interference. This includes other media playback devices, cell phones, speakers, and anything else you might think could be a problem. Better safe than sorry.
You can capture now :) (Start recording with your cap device and hit play on the LD player with the proper laserdisc inserted). Remember that you may have to switch sides manually and change discs. Don't leave the LD player alone and miss the changes, this could add unwanted video to your capture.
After Your Capture
Remove your disc and put it back in its case. Reset your proc amp/detailer to the default position to turn it off, and unplug any devices you don't need at this point.
Finalizing your Rip
If you used a DVD recorder for capture, go into the recorder's menu and label your DVD and then finalize it. Finalizing it is very important, without it your computer cannot recognize it. If you made several DVDs, you need to do this to each disc.
Should I Edit?
Because you either manually flip/change discs or the player changes the side of the disc, there will be some video recorded while this process is happening. This usually results in a blue screen with "A->B" appearing in the top corner for both-side players.
So should this little blemish be left in the rip or taken out? Many people choose to leave this side switch in. If anything it is a little piece of nostalgia that shouldn't be forgotten. Other people may want a "cleaner" rip and edit this segment out of their final product. The choice is yours.
What about multiple DVD-Rs? For this, it is suggested to at least join all the capture files together. There can be a few seconds of blue screen in-between the main film, but if you forget to stop recording for ten minutes and this shows in your video, expect negative comments.
Note: Some LD players may announce the "A->B" switch during the actual film. For this, there may be no other way to preserve the whole film then to leave this in.
On the Computer
Now if you did anything other than the DVD Recorder method, you should have the video file on your computer nice and ready for you. If you don't and have a DVD, you will need to find a separate guide for ripping a DVD to your computer.
I will also not be covering encoding, as many others here have created fantastic guides on the topic, but I have a few pointers. Make sure your video is deinterlaced or ivtc'd as needed. Also, be sure to do proper cropping (remove the VHS tracking line in the image) and correct the aspect ratio as necessary. It is also important to point out that your encoding application may have several filters to help out your encode, such as a color equalizer, sharpen, denoise, etc. It is a good idea to play around with filters and see what works and what doesn't. Experimentation will get you far.
Closure
So if you made it all the way through this rough guide, thanks for reading and I hope it helps a lot. You are now a laserdisc ripping master (Suck it VHS!). You are now as cool as this guy:
